Capricorn: Dec.22-Jan.29 The Sundial Primer
created by Carl Sabanski
Capricorn: Dec.22-Jan.29

Mr. Sun The Sundial Primer Index "Sunny Day U" Index Mr. Sun

"SUNNY DAY U"


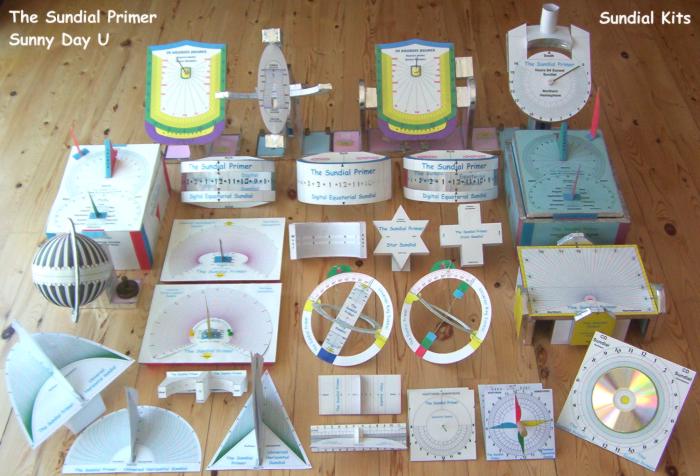
Sundial Kits

Here at "Sunny Day U" we want everyone to be able to enjoy making a sundial that will actually work. So we have put together a number of paper sundial kits. Some are quite easy to assemble but there are a couple that are a challenge. All are possible as can be seen from the models below.

The kits are available in models for both the Northern and Southern Hemispheres. Some even come in various sizes. All you need are scissors, glue and a little patience. Try them all!

Each of these sundials is illustrated with a 3-dimensional drawing that was created using a CAD (Computer Aided Design) software package. Once the sundial was drawn a light source was defined. This light source simulated the sun. To do this a latitude and longitude were entered to position the sundial anywhere in the world. A month, day and time were selected. The sundial must be positioned correctly in order for the sun to illuminate it as it would if it were real. The 3-dimensional drawing is then rendered. This process gives the drawing a photo-like finish. It also projects a shadow on the sundial that appears as it would if you were looking at a real sundial. In every case the time shown on the sundial images matched the time that was entered.

This technique could be used to check a sundial design. Creating the 3-dimensional drawing can take quite some time if it is complex. The Sundial Primer has many interesting 3-dimensional sundial drawings used to illustrate the various kinds of sundials presented there.

All of these sundials indicate local apparent or solar time.  To convert this to clock time you need a "Correct-A-Dial" or "Correct-A-Dial II".


For both the Northern and Southern Hemispheres!

Paper sundial kits for 21 types of sundials available in 74 models.

A few sundial models.


Equatorial Sundial Kit

This sundial won't take you long to put together. This is a great science project.

Equatorial Sundial Model Equatorial Sundial Kit

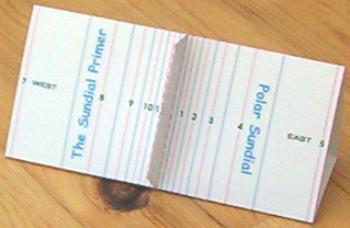
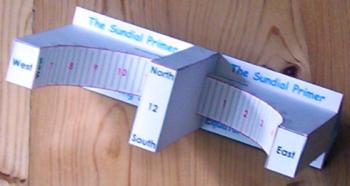
Polar Sundial Kit

This sundial is even an easier one to make. You don't have to find a gnomon.

Polar Sundial Model Polar Sundial Kit

Cycloid Polar Sundial Kit

The cycloid polar sundial is very unique. You will discover its special qualities when you make it.

Cycloid Polar Sundial Model Cycloid Polar Sundial Kit

Cross Sundial Kit

This sundial will take a bit of patience to put together, particularly if you decide to make the small one.

Cross Sundial Model Cross Sundial Kit

Equatorial Ring Sundial Kit

This sundial is a variation of the equatorial sundial shown above. It's a little tricky to put together. Be careful to align the parts.

Equatorial Ring Sundial Model Equatorial Ring Sundial Kit

Star Sundial Kit

This sundial is as much fun to make as the cross sundial.

Star Sundial Model Star Sundial Kit

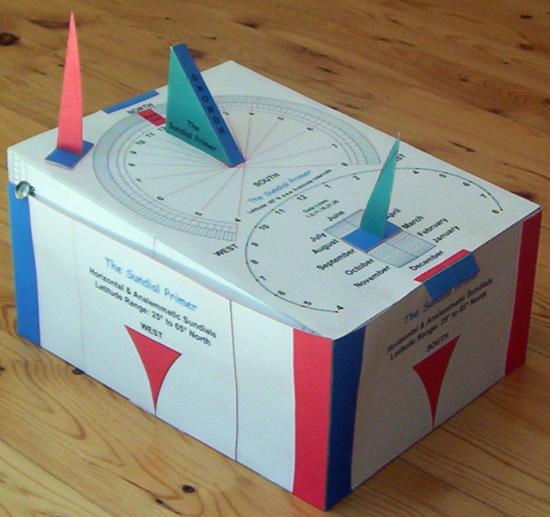
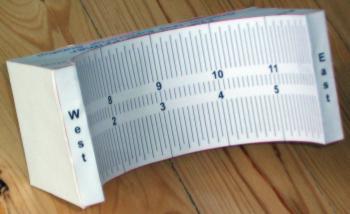
Horizontal/Analemmatic Sundials Kit

This is a very useful combination of sundials. They will help you to find your local meridian.

Horizontal/Analemmatic Sundials Model Horizontal/Analemmatic Sundials Kit

CD Sundial Kit

This sundial is easy to make and a lot of fun to use.

CD Sundial Model CD Sundial Kit

Gnomon-less Equatorial Sundial Kit

This sundial has no gnomon! Hmmm...How do you tell what time it is? That's easy!

Gnomon-less Equatorial Sundial Model Gnomonless Equatorial Sundial Kit

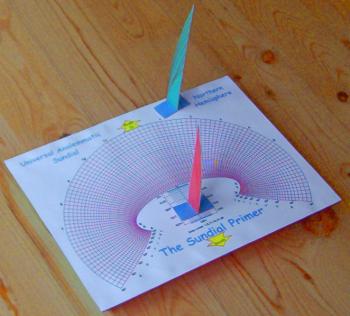
Universal Analemmatic Sundial Kit

This sundial is easy to make. The challenge is the frame it is mounted on.

Universal Analemmatic Sundial Model Universal Analemmatic Sundial Kit

Digital Equatorial Sundial Kit

If you are looking for a challenge try making one of these sundials. It's really not that hard!

Digital Equatorial Sundial Models Digital Equatorial Sundial Kit

Standard Time Equatorial Sundial Kit

This sundial will actually tell you clock time! What is a vernier scale? Come and find out.

Standard Time Equatorial Sundial Standard Time Equatorial Sundial Kit

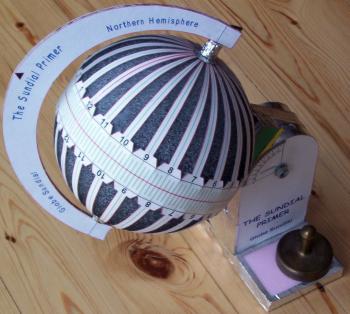
Globe Sundial Kit

The only paper globe sundial kit in the world! 

Globe Sundial Globe Sundial Kit

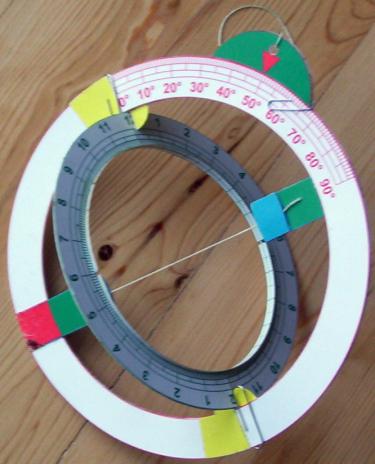
Universal Ring Sundial Kit

This sundial will work anywhere! It's fun to make too.

Universal Ring Sundial Universal Ring Sundial Kit

Pinwheel Equatorial Sundial Kit

A slight variation in the layout of the hour lines of an equatorial sundial makes for another interesting sundial. Give it a try!

Pinewheel  Equatorial Sundial Pinwheel Equatorial Sundial Kit

Universal Horizontal Sundial Kit

Here are a few cool looking sundials that are easy to build and will get a lot of attention!

Universal Horizontal Sundials Universal Horizontal Sundial Kit

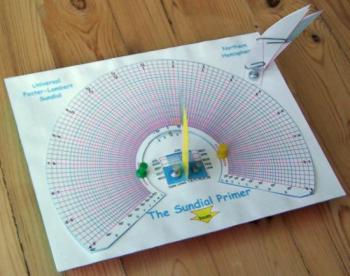
Universal Foster-Lambert Sundial Kit

This sundial is similar to the Universal Analemmatic Sundial but instead of ellipses it uses circles 

Universal Foster-Lambert Sundial Universal Foster-Lambert Sundial Kit

Universal Bifilar Sundial Kit

This is quite a different and unique sundial that uses a couple of pieces of string to tell the time.

Universal Bifilar Sundial Universal Bifilar Sundial Kit

Standard Time Equatorial Ring Sundial Kit

A little twist of the Standard Time Equatorial Sundial shown above will give you this sundial. A bit of a challenge!

Standard Time Equatorial Ring Sundial Standard Time Equatorial Ring Sundial Kit

Universal Hours Before Sunset Sundial Kit

If you want to know how long before the sun is going to set than you need to make one of these sundials.

Universal Hours Before Sunset Sundial Universal Hours Before Sunset Sundial Kit

Modeling Tips and Techniques

While making these paper sundial models I learned a few things that just may help you when you make yours. Remember that these are only my suggestions. You may find some other ways that make building these sundials easier. In any case I hope that you have fun making and using  these sundial models and perhaps learn a little about sundials along the way.

  • DO NOT RUSH! The quality, and as a result accuracy, of your sundial model is directly proportional to the time and effort you put into making it.

  • There are not very many instructions but if you find some please read them. They are there to help you and some are a result of the mistakes I made. I don't want them to happen to you.

  • Print all the pages at full (100%, 1:1) scale. If you print to another scale make sure that you print all the pages of the kit at the same scale. Do not use "Fit to Page".

  • Print the kits on a heavier weight paper like card stock. Ordinary paper is too light and the models may not hold their shape. The small sundial kits, such as for the cross and star sundials, can be made from ordinary paper and can be shaped quite well.

  • Cut all the parts out very carefully. With a good pair of scissors you can easily follow all the lines. If a tag is lost when cutting a part out write it on the back. It may help later during assembly.  Save the cut offs as you may be able to use them to reinforce joints if necessary.

  • Fold all the parts along all the fold lines. Folding thicker paper like card stock can be a little tricky. Most of the folds are mountain folds and the fold line will be visible when the fold is complete. There are very few valley folds. To get an accurate fold, I start every fold as a valley fold. You will need a 6-inch plastic ruler. Align the ruler with the fold line. You will learn very quickly where to position the ruler for a good fold. Fold the paper up against the edge of the ruler until it stands straight up. This creates a valley fold that can be folded further to make a sharp edge. Check to make sure that the fold will be on the line. If you want a mountain fold remove the ruler and flatten the fold. The paper is now broken along the fold line and can be folded over following the line. The fold can be adjusted slightly, if required, by pushing with your thumbs. This technique will result in pretty much perfect fold lines.

  • You are almost ready to glue. Before you start to glue the parts together try to dry fit them as you go along. This will help you to find the best sequence to use for assembly.

  • Now you are ready to glue. I use an inexpensive mucilage glue. This glue comes from the seeds, bark or roots of various plants by making an infusion in water. The container may have a rubber top applicator. Do not use this unless you are gluing two large pieces of paper together. The only problem with this glue is that it shrinks as it dries and this may result in the paper warping. I find that once the glue and paper is completely dry you can work out most of the warps. Try applying glue to large areas in spots instead of spreading it over the entire area. For gluing together large pieces use a no wrinkle rubber cement. It works very well.

  • To apply the glue use cotton swabs, which are small plastic or paper sticks with a bit of cotton applied to each end. This makes it very easy to control the amount of glue you apply to a part. If a lot of glue is applied it is easy to slide the two parts together to make alignment adjustments. A little glue will result in the parts sticking together more quickly and adjustment may not be possible. You will learn very quickly how much glue is the "right" amount of glue.

  • Do not release the parts until the glue has set and do not go on to the next joint until the last one is securely fixed. This does not take a long time but if you hurry a joint will slip and set in the wrong position. Bad joints are usually hard to take apart without causing damage.

  • Have patience and in no time your sundial will be complete and ready for use. We'd love to see your sundial. Send us a photo.

Happy Dialling!